又回到Arch Linux的巨坑了,犹记得两年前第一次接触到Arch Linux的时候光是安装就用了好几天才稿明白,才弄出能用的图形界面,后来滚动更新还是滚坏了。但是 arch 的优点就是软件包特别多、更新快,安装起来也很方便,所以最近又用回arch啦,这次安装比较顺利,也配置好了喜欢的桌面环境。
先放一张安装好的桌面截图
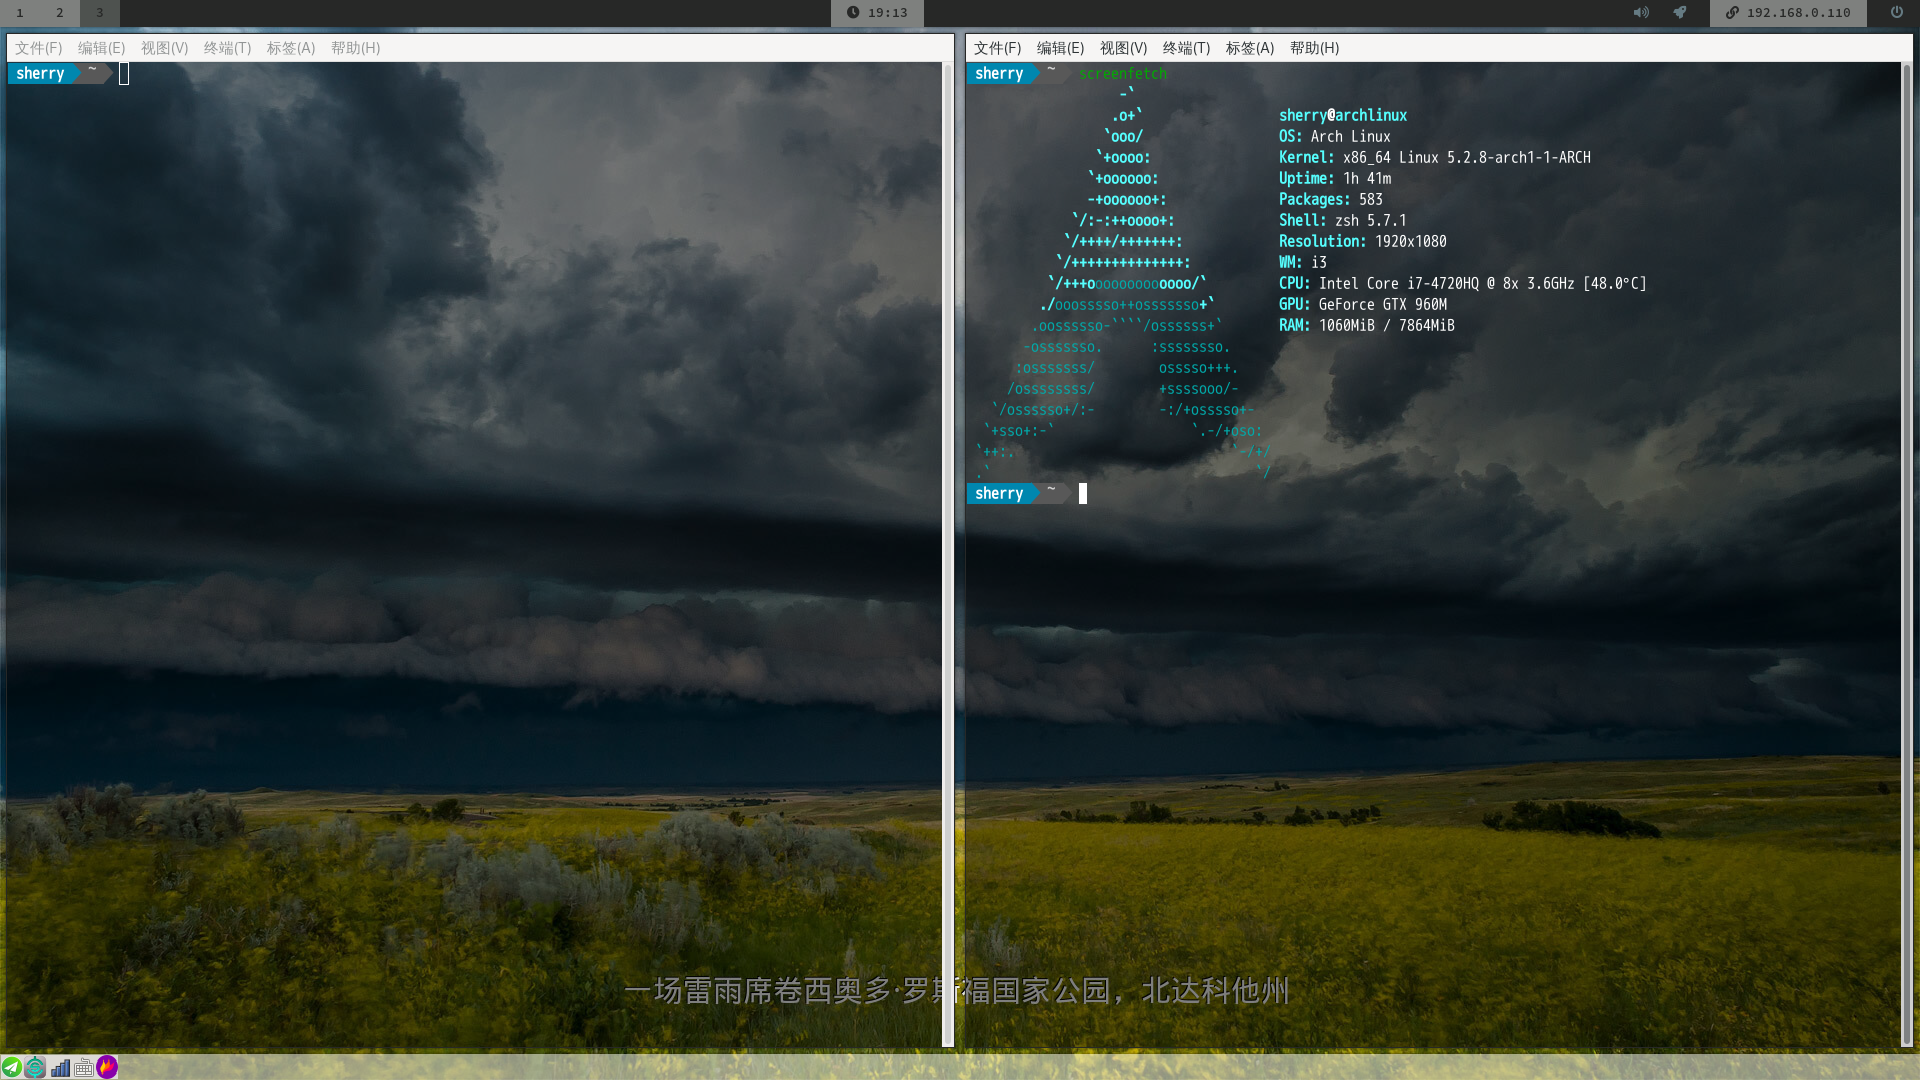
i3wm+polybar+trayer
1.安装前准备
1.1 联网
检查网络是否连接好,能ping通就代表成功了
1
2
|
wifi-menu
ping www.baidu.com
|
1.2 使用系统时间
1
|
timedatectl set-ntp true
|
1.3 分区以及挂载{disk}
主要有efi分区,主分区,swap分区,具体的分区大小以及其它分区选择可以参考wiki以及https://www.viseator.com/2017/05/17/arch_install/ 这篇文章
 1
 2
 3
 4
 5
 6
 7
 8
 9
10
11
12
13
|
# 删除分区
dmsetup remove_all
# 进行分区选择
fdisk /dev/sda
# 格式化主分区
mkfs.ext4 /dev/sdX1
# swap分区
mkswap /dev/sdX2
swapon /dev/sdX2
# 挂载分区
mount /dev/sdX1 /mnt
mkdir /mnt/boot
mount /dev/sdx3 /mnt/boot (请将sdxY替换为之前创建或是已经存在的引导分区)
|
1.4 选择镜像
1
|
nano /etc/pacman.d/mirrorlist
|
把清华镜像站放到前面
1.5 安装基础包
1
|
pacstrap /mnt base base-devel
|
2.配置系统
2.1 Fstab
1
2
|
genfstab -U /mnt >> /mnt/etc/fstab
cat /mnt/etc/fstab
|
2.2 chroot
2.3 设置时区
ln -sf /usr/share/zoneinfo/Asia/Shanghai /etc/localtime
hwclock --systohc
2.4 设置Locale
取消想用的语言的注释
nano /etc/locale.gen
locale-gen
nano /etc/locale.conf
2.5 设置密码,添加用户
passwd
useradd -m username
passwd username
# 设置sudo 权限
nano /etc/sudoers
2.6 安装Bootloader
此处包括之前分区都是以efi为前提的
pacman -S grub efibootmgr
grub-install --target=x86_64-efi --efi-directory=/boot --bootloader-id=grub
grub-mkconfig -o /boot/grub/grub.cfg
2.7 安装软件
安装以下软件以便移除U盘后可以联网
pacman -S vim dialog wpa_supplicant ntfs-3g networkmanager git
3. 图形界面
3.1 Xorg
1
|
sudo pacman -S xorg xorg-xinit
|
3.2 显卡及声卡驱动
1
|
sudo pacman -S nvidia xf86-video-intel alsa-utils
|
3.3 i3wm
使用i3wm的优化版i3-gaps
1
2
|
sudo pacman -S  i3lock i3status compton dmenu feh
yay i3-gaps
|
使用现成的i3wm配置,进行微量修改
1
2
3
|
git clone https://github.com/unix121/i3wm-themer
cd i3wm-themer/
./install_arch.sh
|
记得把修改后的配置文件进行备份
3.4 显示管理器
1
2
|
yay lightdm
sudo systemctl enable lightdm
|
4. 必装软件
4.1 yay
1
2
3
|
git clone https://aur.archlinux.org/yay.git
cd yay
makepkg -si
|
4.2 oh-my-zsh + xfce4-terminal
1
2
3
|
sudo pacman -S zsh xfce4-terminal
sh -c "$(curl -fsSL https://raw.github.com/robbyrussell/oh-my-zsh/master/tools/install.sh)"
yay -S powerline-fonts powerline
|
安装插件,在~/.zshrc 文件中添加插件名,
https://github.com/robbyrussell/oh-my-zsh/wiki/Plugins 为插件列表
1
2
3
4
5
|
# zsh-syntax-highlighting
git clone https://github.com/zsh-users/zsh-syntax-highlighting.git ${ZSH_CUSTOM:-~/.oh-my-zsh/custom}/plugins/zsh-syntax-highlighting

# zsh-autosuggestions
git clone https://github.com/zsh-users/zsh-autosuggestions ${ZSH_CUSTOM:-~/.oh-my-zsh/custom}/plugins/zsh-autosuggestions
|
4.3 thunar
1
|
yay -S thunar thunar-archive-plugin xarchiver
|
4.5 google-chrome
archlinux可以直接安装,不象centos/fedora还要添加软件源
可以安装插件switchyOmega,Tampermonkey
4.6 中文字体+输入法
1
|
sudo pacman -S fcitx fcitx-libpinyin
|
设置环境
加入以下内容
GTK_IM_MODULE=fcitx
QT_IM_MODULE=fcitx
XMODIFIERS=@im=fcitx
4.7 其他推荐的软件列表(持续更新)
- 系统托盘: trayer(因为polybar不显示托盘)
- 调节亮度 : mate-power-manager
- 截图:flameshot
- 声音管理: pavucontrol
- 音频编辑: audacity
- 视频播放器 : smplayer , vlc
- 文本编辑器: sublime text (配合上面的zsh插件)
参考
- 以官方Wiki的方式安装ArchLinux https://www.viseator.com/2017/05/17/arch_install/
- ArchLinux wiki https://wiki.archlinux.org/index.php/Installation_guide
- ArchLinux搭建高效便捷的平铺式桌面 https://segmentfault.com/a/1190000008280278
- ArchLinux你可能需要知道的操作与软件包推荐「持续更新」https://www.viseator.com/2017/07/02/arch_more/
- i3wm-themer https://github.com/unix121/i3wm-themer
- zsh oh-my-zsh 插件推荐 https://hufangyun.com/2017/zsh-plugin/